Just two weeks after Microsoft released the Anniversary Update for Windows 10 PCs, the same update has now started to roll out for Windows 10 Mobile handsets. While phones didn’t get as much love as Windows PCs for this first Redstone wave, the Windows 10 Mobile build 14393.67 still brings a pack of solid improvements to Microsoft’s mobile operating system.
If Windows 10 Mobile is still struggling against iOS and Android in 2016, there is no denying that the OS is still a valuable offering for those looking for a good mix of simplicity, customizability and productivity. And nearly six years after its first entry on the market, the Windows Phone start screen may still be the best home screen experience ever, mostly thanks to the versatility of Live Tiles.
If you’re not familiar with Windows 10 Mobile or if you’re looking for some tips to optimize your start screen experience, keep reading as we will share with you the most basic tips to set up your start screen as well as some less-known features that can improve your productivity.
Set background, transparency, accent color and dark/white mode
From your device settings, go to “Personalization” and then choose “Start”. From here, you will be able to choose your background picture that you can either set as a full screen picture or as a Windows Phone 8.1-style “tile picture”, which means that your picture will be displayed directly on your Live Tiles, with a cool effect when you scroll up on down your start screen

If you choose the full screen picture setting, You can also set your title transparency: setting it to 100% will make your tiles fully transparent, which will definitely achieve a look that is more similar that what you can find on Android or iOS. However, be aware that the tile transparency setting doesn’t affect some apps which will always retain their Live Tile color (such as the Office apps, the MSN apps, the Xbox app and more).
Some apps such as Microsoft Health currently allow you to enable a transparent live tile in the settings, and we hope Microsoft and third-party developers will follow that path in the future. Additionally, the ‘show more tiles’ toggle can be used to switch between a two-column, three column or even four column layout on your start screen, but we will have more on that later.
Once you’re done, you can go back to the settings and to the Personalization settings and then go to “Colors”: from there, you will be able to switch between dark and light mode and also select your accent color which will be applied in many UI elements.

While Microsoft barely uses the light theme in official Lumia marketing pictures, it’s still a nice addition that may be preferred by those of you who come from Android or iOS. However, be aware that if your Windows Phone features an AMOLED screen (you’re in that case if you use a Lumia 650, 950 or 950XL), then the dark mode will be your ideal setting as the black pixels actually turn off on such screens, which looks definitely better and is also more energy efficient.
Resize your Live Tiles
This is another basic tip, but it’s still worth a reminder: on Windows 10 Mobile, you can either set your Live Tiles as small, normal or wide, which gives you a lot of flexibility to set up your home screen. However, some Live Tiles won’t be “live” unless you set them as normal or wide: as an example, the MSN Weather and Money apps will stay live when you set them as small Live Tiles but the Phone and Messaging app need to be set as wide to display any information on your recent calls or messages.
While wide Live Tiles take more precious space on your start screen, they can also display more useful content: as an example, the MSN Weather app can give you an extended forecast and the Outlook Calendar has also been recently updated to display up to 3 upcoming events on its Live Tile.

Put your Live Tiles into Folders
If you’re looking to avoid clutter on your home screen and group together some of your Live Tiles, then folders are the way to go. You can create folders by simply dragging a Live Tile over another one on your start screen, and you can create as many as you like. Even better, folders are also “live” and you will still be able to see status updates from your grouped Live Tiles by just glancing on your folders on your start screen.

Pin content from live tiles
Windows 10 Mobile also allows you to pin select content from apps on your start screen, here are a few examples below:
- You can pin artists, albums, playlists from the Groove Music app
- You can pin forecasts from different cities from the MSN Weather app
- The OneDrive app also allows you to pin OneDrive folders on your start screen

If you also want to have quick access to your device settings, it’s also possible to pin select items from the Windows 10 Mobile settings app: to do it, just do a long press on the category of your choice (it also works with select sub-categories) and then tap “Pin to start”.
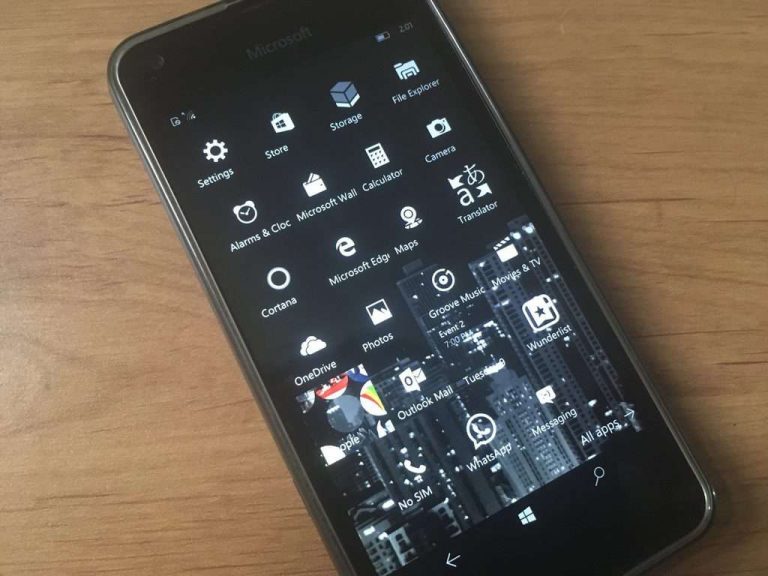
The four columns layout aka Windows 10 Mobile “phablet mode”
Power users may already know this tip, but Windows 10 Mobile allows you to add a fourth column of live tiles to your start screen, which makes it possible to add much more content without needing to use small Live Tiles or folders. This phablet layout is perfectly usable if you have a screen smaller than 5-inches, though you may need to adjust your text size to make everything still readable.

Here is how to enable this four column layout on your windows 10 phone:
- Go to “Settings”, “System” and then “Display”
- Adjust the cursor under Size of text, apps, and items on this display. Please note that the lower the percentage, the smaller elements on the screen will appear.
- Once you hit “apply”, the OS will then ask you to reset your device.
- To enable the fourth column on your start screen, you must now go back into settings: go into “Personalization”, then “Start”, and set “Show more tiles” to On.
Once you’re done, you must now have an additional row of Live Tiles for your Start Screen as well as an additional utility tile to your Action Center. If you find that the size of text is too small, you can adjust it by going back into Settings: choose “Ease of access” and select “More options, you will find here a slider to adjust text scaling.
The phablet mode also brings other benefits such as optimized layouts for many apps in landscape mode as well as a better Windows 10 Mobile multitasking UI. You can see how it looks in the screenshots below:


Once you try the phablet mode, it’s really hard to go back to the standard three column layout and we wish Microsoft made it a more easily discoverable option in Windows 10 Mobile settings. Try it out and let us know if it makes you fall in love with your Windows Phone once again! Additionally, feel free to show us your own start screens in the comments, as it’s always interesting to see how other users leverage the flexibility of our beloved mobile OS.