How to build your first Power Automate Desktop flow
![]() 4 min. read
4 min. read
![]() Published on
Published on
Share this article

Improve this guide
Read our disclosure page to find out how can you help Windows Report sustain the editorial team Read more
Power Automate Desktop Flows is a powerful tool that allows users to automate repetitive tasks, such as data entry or file management, and can help improve efficiency and productivity.
What is Power Automate Desktop?
Power Automate Desktop is a desktop application that allows users to automate repetitive tasks by creating workflows. This tool is part of the Microsoft Power Platform, which includes Power BI, Power Apps, Power Pages, and Power Virtual Agents.
How do Power Automate Desktop Flows work?
Power Automate Desktop Flows work by recording your mouse and keyboard inputs and then playing them back on demand. You can use the recorder to record your actions, create custom workflows using the flow designer, or use examples and templates provided by Microsoft. Once you have your workflow set up, you can trigger a flow manually or set up triggers to start the flow automatically.
Installation
The first step in getting started with Power Automate Desktop is to install the application. The software is available for free and can be downloaded directly from the Microsoft website. Once the software is installed, you will need to create an account or sign in with your existing Microsoft account.
Creating a New Flow
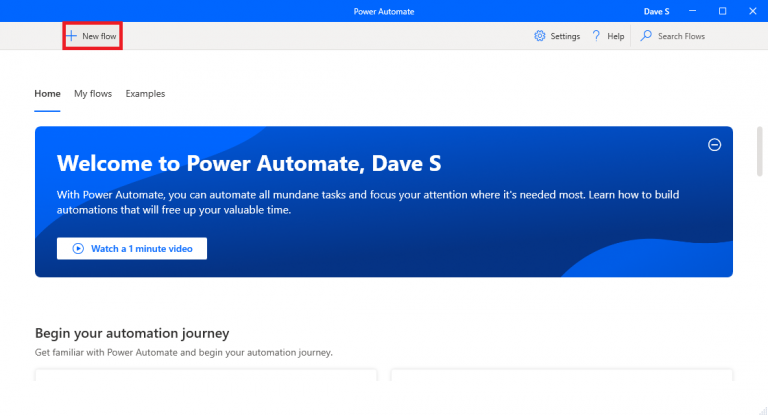
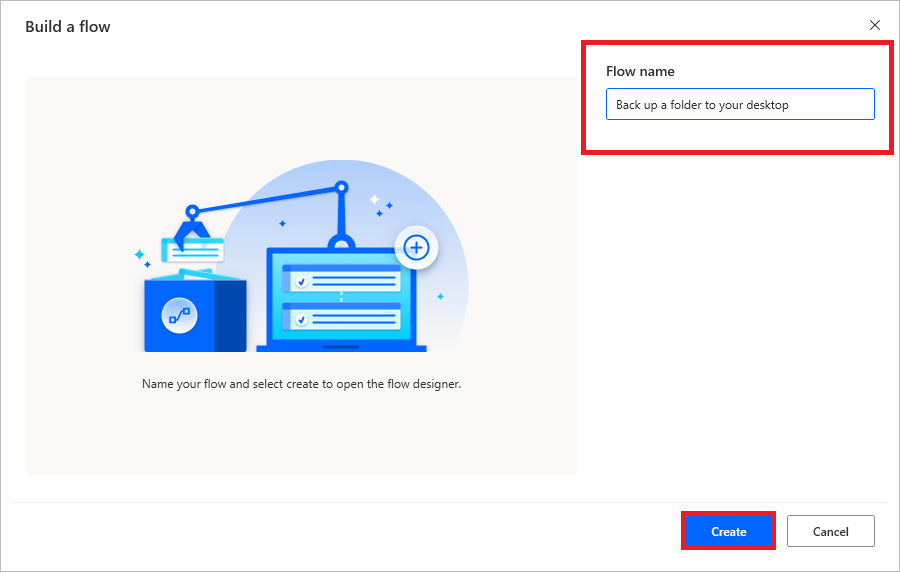
After you have installed Power Automate Desktop, you can begin creating your first flow. To create a new flow, click on the New flow button at the top of the Power Automate Desktop window. Next, you will be prompted to create a name for your new flow, click Create once you name the Power Automate Desktop Flow. This will open a new flow in the designer, where you can add and configure different Actions to a flow.
Adding Actions
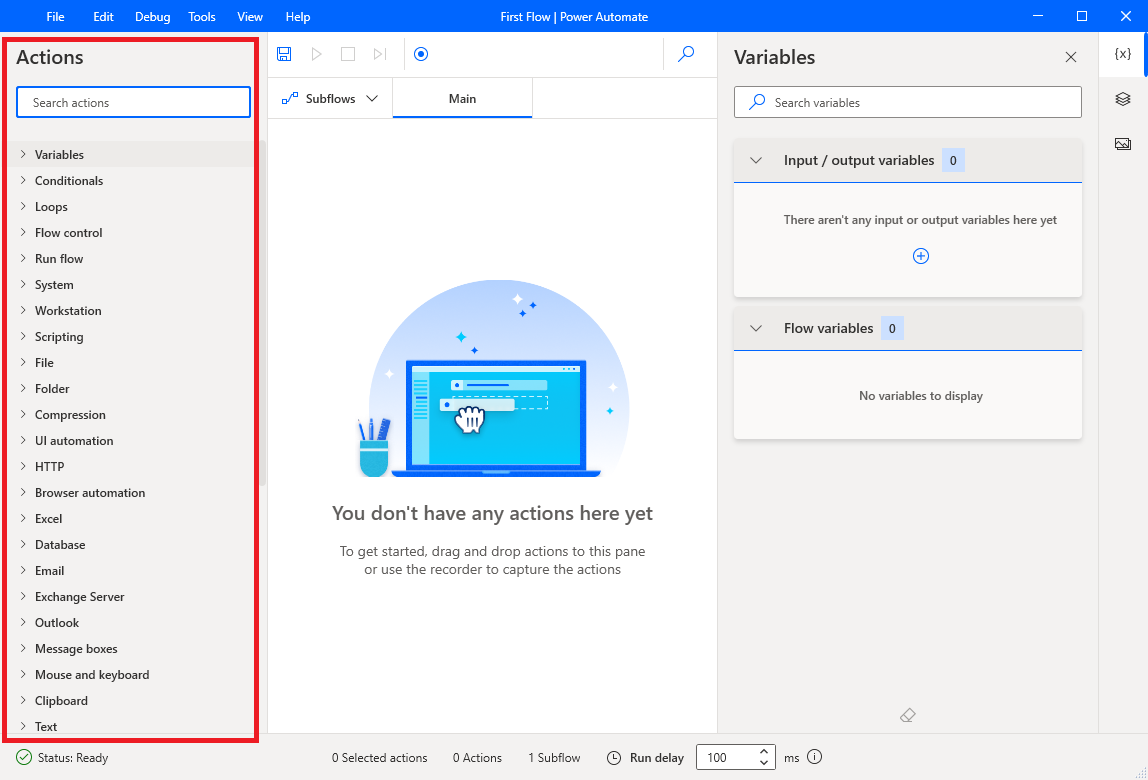
The next step in creating a flow is to add Actions. Actions are individual steps in the flow that perform a specific task, such as opening a file or copying data from one location to another. To add an action, use the search box to find existing Actions in the designer, or click the Action you wish to perform from the list of available options below the search box. 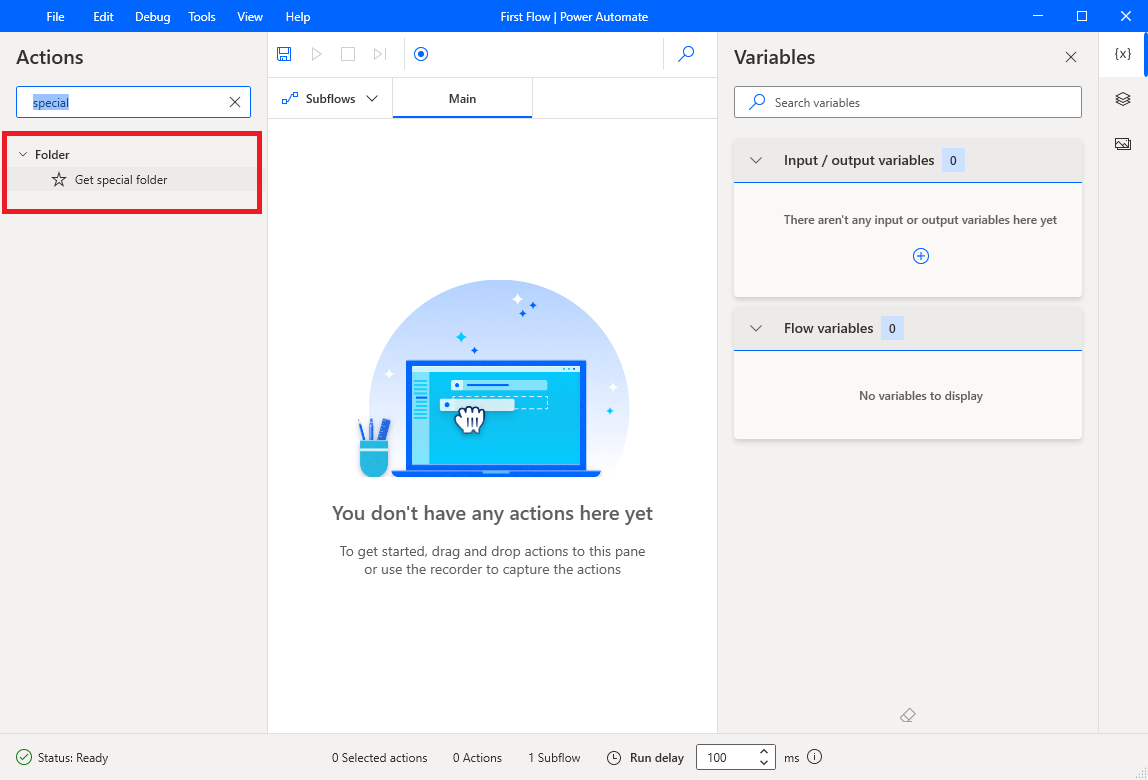
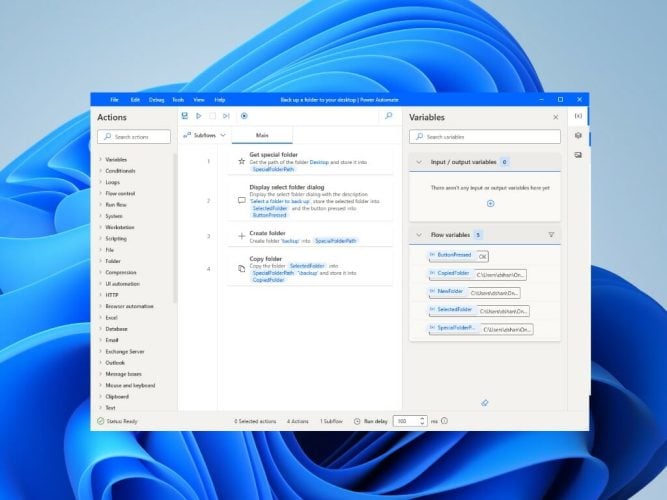
This example the instructions provided here to build your first flow to test out in Power Automate Desktop. This flow creates a back up of a folder and saves it to your desktop on your PC.
Configuring Actions
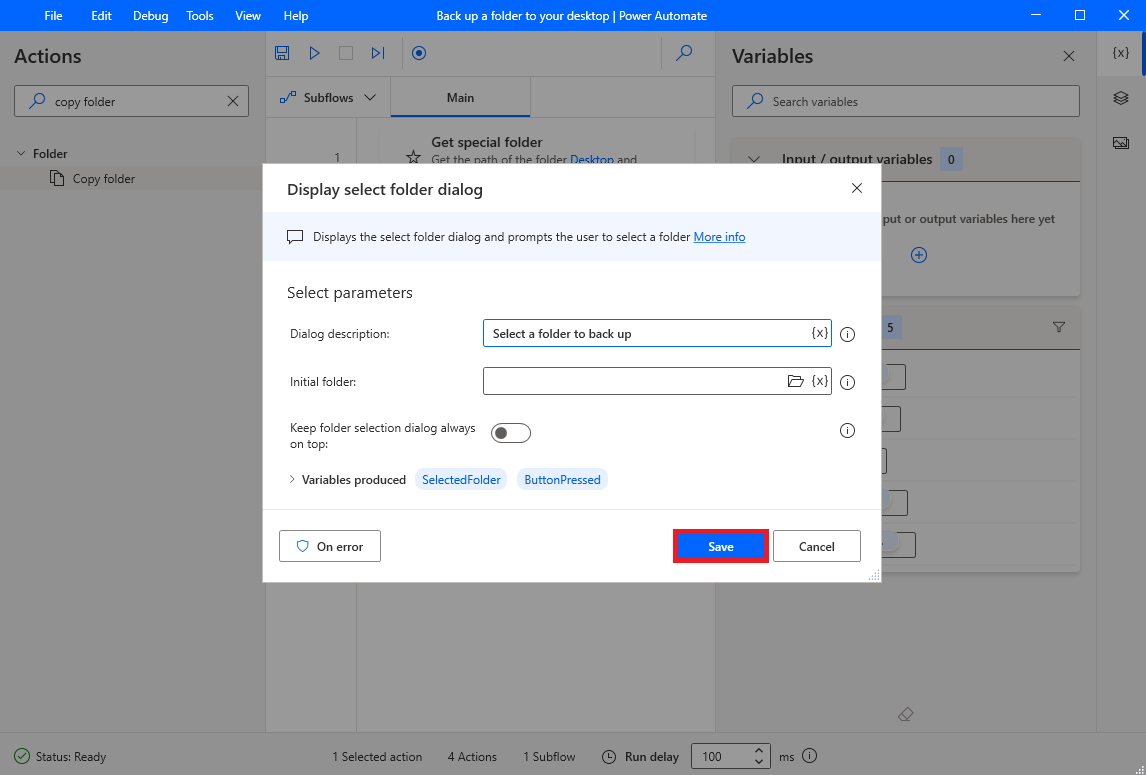
Once you have added an Action to your flow, you will need to configure it to meet your specific needs. This may include specifying the file location or setting the input parameters for the action. To configure an Action, double-click on the Action in the designer and use the configuration panel to edit the variables as needed. Click Save when you are finished configuring the Actions of the flow.
Execute a flow
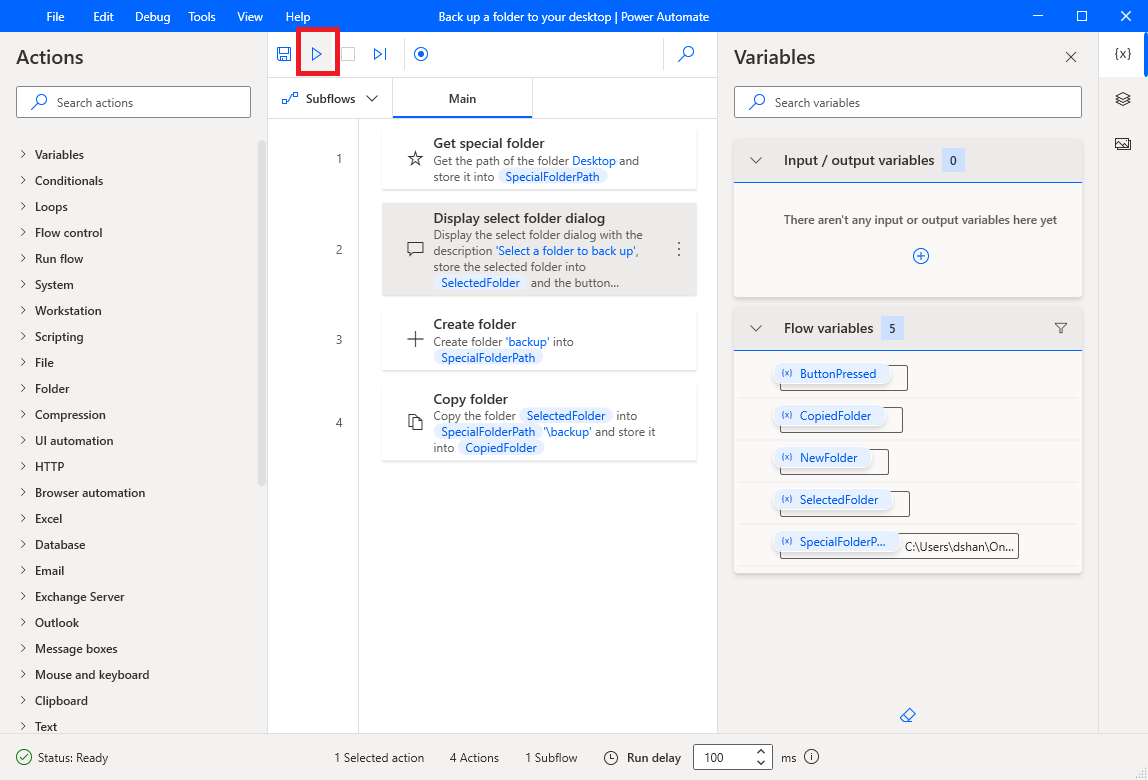
Once you have created and configured your flow, you can execute it by clicking on the “Run” button as shown in the Power Automate Desktop window. This will start the flow and perform the specified actions in sequence. You can also choose to your pause or stop your flow at anytime by using the corresponding buttons at the top. In addition, you should see a turquoise stripe at the bottom of the window, indicating that that your flow is currently running.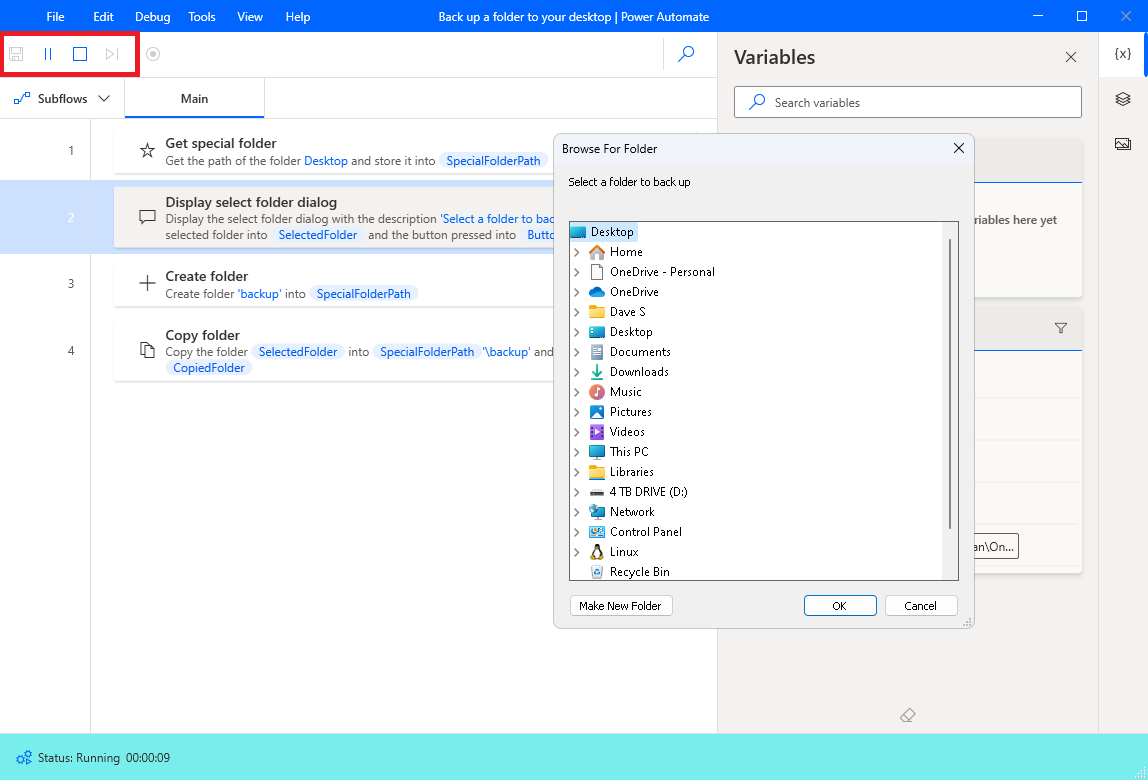
Conclusion
Power Automate Desktop is a powerful tool that can help automate repetitive tasks and improve productivity. In this guide, we covered the basics of getting started with Power Automate Desktop, including the installation process, creating a new flow, adding actions, configuring actions, and executing a flow. We hope that this guide has been helpful in getting you started with Power Automate Desktop and that you find it useful for your workflow.